Unlocking Success: The Ultimate Guide to Fishing Leaders
Welcome to our comprehensive guide on fishing leaders, where we delve deep into everything you need to know to elevate your angling game. Fishing leaders are the unsung heroes of the fishing world, serving as the crucial link between anglers and their prized catches. In this article, we’ll explore the intricacies of fishing leaders, from understanding the different types and materials to mastering advanced techniques. Whether you’re a novice angler or a seasoned pro, this guide will equip you with the knowledge and skills to craft effective leaders that increase your chances of success on the water. So, grab your gear and join us as we unravel the secrets to mastering fishing leaders.
Table of Contents
Choosing the Right Fishing Leader Material
When it comes to crafting fishing leaders, selecting the appropriate leader material is crucial for achieving success on the water. The right leader material can enhance the performance of your rig, improve your chances of hooking and landing fish, and ensure the durability of your setup. Here’s what you need to consider when choosing the right leader material for your fishing endeavors.
Fishing Leader Properties to Consider:
Before diving into specific types of leader materials, it’s essential to understand the key properties that differentiate them. When selecting leader material, consider factors such as strength, visibility, abrasion resistance, and flexibility.
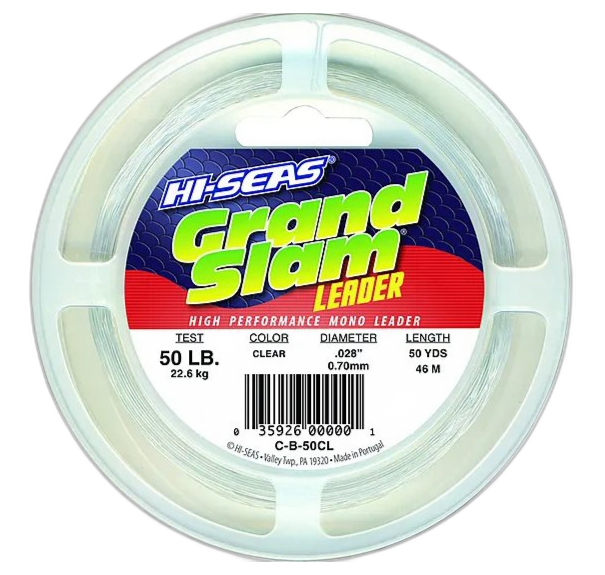
Monofilament: Monofilament leaders are versatile and widely used among anglers. They offer good strength, flexibility, and knot-tying ability. Monofilament leaders are suitable for various fishing applications and are particularly effective when targeting species in freshwater or inshore saltwater environments.
- High visibility in water, especially in clear conditions.
- Offers some stretch, which can absorb shock and prevent line breakage.
- Relatively buoyant, making it suitable for topwater fishing techniques.
- Moderate abrasion resistance, although it can weaken over time with exposure to sunlight and water.
Fluorocarbon: Characteristics:
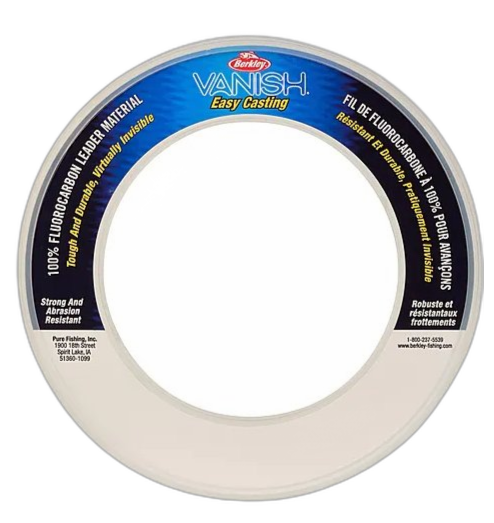
- Low visibility underwater, making it ideal for clear water and finicky fish.
- Greater density than water, causing it to sink, which can be advantageous for certain fishing techniques.
- Excellent abrasion resistance, making it suitable for fishing around rocks, reefs, and other structures.
- Minimal stretch, providing increased sensitivity to detect subtle bites.
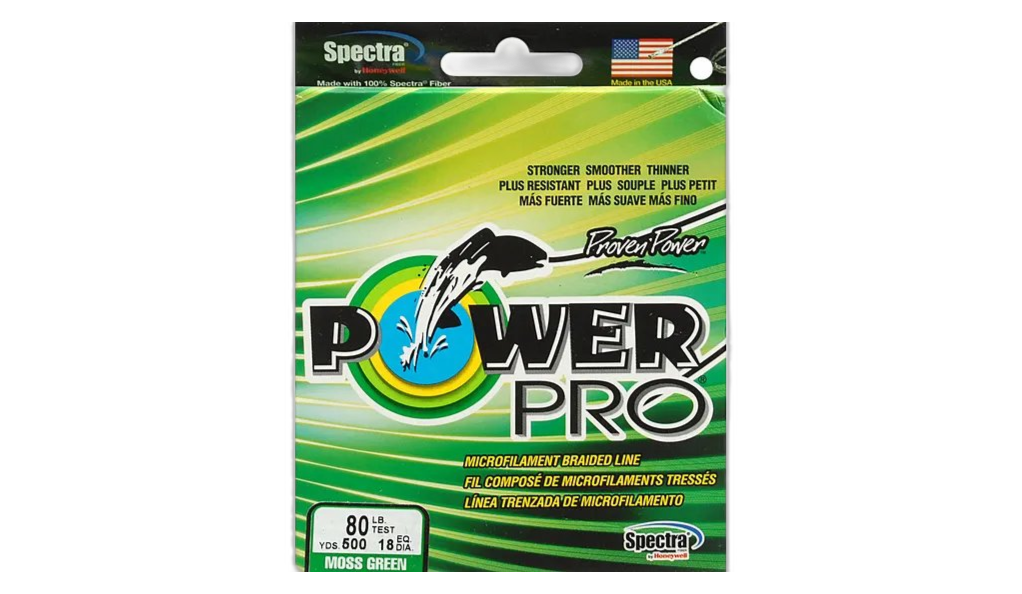
Braided Line: While braided line is not traditionally used as a leader material, it can be used in certain fishing scenarios where high strength and low visibility are required. Braided line offers exceptional strength-to-diameter ratio, allowing anglers to use thinner lines without sacrificing strength. Braided line leaders are commonly used in finesse fishing techniques and when targeting large, hard-fighting fish species.
- High strength-to-diameter ratio, offering exceptional strength and durability.
- Minimal stretch, providing excellent sensitivity to detect even the slightest bites.
- Low visibility in water, particularly in darker colors or when coated with camouflage patterns.
- Abrasion-resistant, making it suitable for fishing in heavy cover or around abrasive structures.
Essential Tools and Equipment for making Fishing Leaders
Crafting fishing leaders requires the right tools and equipment to ensure precision and reliability. Having the appropriate gear on hand will not only streamline the leader-making process but also contribute to the effectiveness and longevity of your fishing leaders. Here’s a rundown of the essential tools and equipment you’ll need to create quality fishing leaders.
Cutting Tools:
Sharp cutting tools are indispensable for cleanly cutting leader material to the desired length. A pair of high-quality scissors or line cutters specifically designed for fishing applications are essential for achieving precise cuts without fraying or damaging the leader material.
Crimping Tools:
Crimping tools are used to secure sleeves or crimps onto the ends of leader material, ensuring strong and reliable connections between components. Look for a crimping tool that is suitable for the size of crimps you’ll be using and provides consistent and secure crimps every time.
Leader Sleeves or Crimps:
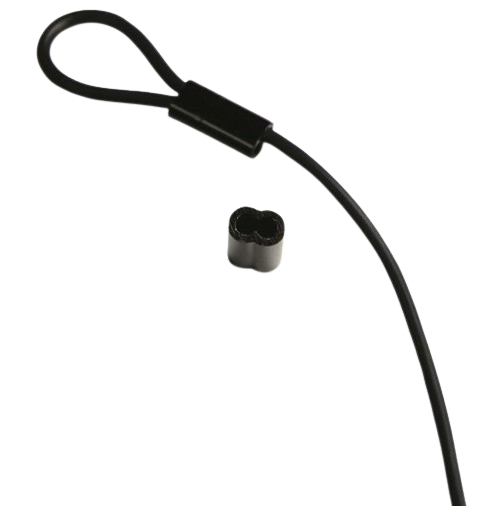
Leader sleeves or crimps are small metal components used to create loops or connections in fishing leaders. They come in various sizes to accommodate different leader materials and are essential for forming secure connections between leader segments, hooks, swivels, and other terminal tackle.
Fishing Leader Straighteners:
Leader straighteners are handy tools for removing any kinks or curls from leader material, ensuring smooth and straight leaders that perform optimally in the water. They are particularly useful for fluorocarbon and monofilament leaders, which can sometimes retain memory from being spooled onto reels.
Swivels and Snaps:
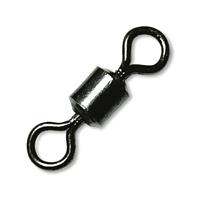
Swivels and snaps are crucial components for attaching leaders to mainline or terminal tackle. Swivels prevent line twist and provide freedom of movement for bait or lures, while snaps allow for quick and easy changes of terminal tackle without retying knots.
Basic Knots for Attaching Fishing Leaders
Mastering basic knots for attaching fishing leaders is essential for ensuring strong and reliable connections between your leader material, terminal tackle, and mainline. Whether you’re tying on hooks, swivels, or connecting leader segments, knowing the right knots will help prevent break-offs and increase your chances of landing fish. Here are some of the most commonly used knots in fishing leader construction.
Improved Clinch Knot:
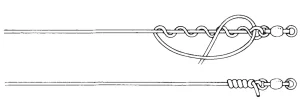
The improved clinch knot is one of the most widely used knots for attaching hooks, swivels, and other terminal tackle to leader material. It is easy to tie and forms a secure connection that holds up well under tension. To tie the improved clinch knot, thread the tag end of the leader through the eye of the hook or swivel, then make five to seven wraps around the standing line. Finally, thread the tag end back through the loop formed near the eye of the hook and pull it tight.
Palomar Knot:
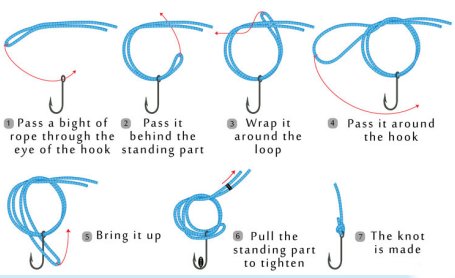
The palomar knot is another popular choice for attaching hooks and swivels to leader material, especially with braided line or fluorocarbon. It is simple to tie and retains almost the full strength of the line. To tie the palomar knot, double the leader material and pass it through the eye of the hook or swivel. Then, tie an overhand knot with the doubled line, leaving a loop large enough to pass the hook or swivel through. Finally, wet the knot and pull both ends of the leader to tighten.
Uni Knot:
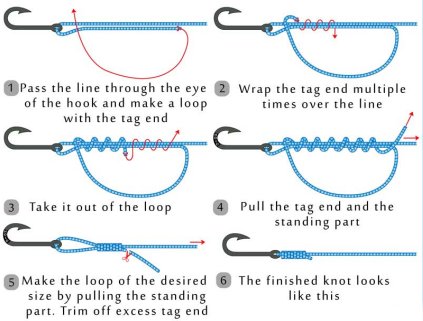
The uni knot is a versatile knot that can be used for attaching leader segments together, joining leader to line, or securing terminal tackle. It is strong, easy to tie, and works well with both monofilament and braided line. To tie the uni knot, overlap the ends of the leader material and make a loop with the tag end. Wrap the tag end around both lines and through the loop formed, repeating this process several times. Finally, moisten the knot and pull it tight.
Albright Knot:
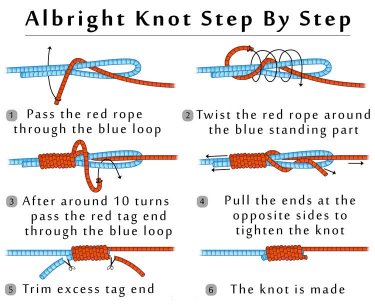
The albright knot is commonly used for joining different types or diameters of line together, such as connecting monofilament or fluorocarbon leader to braided mainline. It forms a strong and streamlined connection that easily passes through rod guides. To tie the albright knot, overlap the ends of the leader and mainline, then wrap the mainline around the leader several times. Thread the mainline back through the loop formed near the leader’s tag end and pull it tight.
Constructing Simple Monofilament Fishing Leaders
Monofilament leaders are versatile and widely used among anglers due to their flexibility, affordability, and ease of use. Crafting simple monofilament leaders is a fundamental skill for anglers of all levels, allowing you to tailor your setup to the specific requirements of your fishing environment and target species. Here’s a step-by-step guide to constructing simple monofilament leaders.
Materials Needed:
Before you begin, gather the following materials:
Monofilament Leader Material: Choose a high-quality monofilament leader material in the appropriate pound test for your target fish species and fishing conditions.
Cutting Tool: Use sharp scissors or line cutters to cleanly cut the leader material to the desired length.
Crimping Tool: A crimping tool is necessary for securely attaching terminal tackle and forming connections between leader segments.
Leader Sleeves or Crimps: Select leader sleeves or crimps in the appropriate size for creating loops or connections in your leader.
Construction Steps:
- Cut Leader Material: Start by cutting the monofilament leader material to the desired length for your fishing rig. Consider factors such as the depth of the water, the size of the fish you’re targeting, and the type of bait or lure you’ll be using.
- Form Loop or Connection: If you’re creating a loop at the end of the leader for attaching terminal tackle, fold the leader material back on itself to form a loop of the desired size. Insert both ends of the leader material through a leader sleeve or crimp, then use a crimping tool to secure the sleeve or crimp in place, ensuring a strong and reliable connection.
- Attach Terminal Tackle: Once the loop or connection is formed, attach your desired terminal tackle, such as hooks, swivels, or snaps, using the appropriate knots. Popular knots for attaching terminal tackle to monofilament leaders include the improved clinch knot, palomar knot, and uni knot.
- Test and Inspect: Before fishing with your newly constructed monofilament leader, carefully inspect all connections for strength and security. Test the knots and connections by applying gentle pressure to ensure they hold up under tension.
- Adjust as Needed: Depending on your fishing conditions and target species, you may need to adjust the length and configuration of your monofilament leader. Be prepared to experiment with different leader lengths, hook sizes, and terminal tackle to find what works best for your fishing situation.
Crafting Fluorocarbon Fishing Leaders
Fluorocarbon leaders have become increasingly popular among anglers due to their low visibility underwater and excellent abrasion resistance. Crafting your own fluorocarbon leaders allows you to customize your setup to suit specific fishing conditions and target species. Here’s a step-by-step guide to crafting fluorocarbon leaders.
Materials Needed:
Before you begin, gather the following materials:
Fluorocarbon Leader Material: Choose a high-quality fluorocarbon leader material in the appropriate pound test for your target fish species and fishing conditions.
Cutting Tool: Use sharp scissors or line cutters to cleanly cut the fluorocarbon leader material to the desired length.
Crimping Tool: A crimping tool is necessary for securely attaching terminal tackle and forming connections between leader segments.
Leader Sleeves or Crimps: Select leader sleeves or crimps in the appropriate size for creating loops or connections in your fluorocarbon leader.
Construction Steps:
- Cut Leader Material: Begin by cutting the fluorocarbon leader material to the desired length for your fishing rig. Consider factors such as water clarity, the size of the fish you’re targeting, and the type of bait or lure you’ll be using.
- Form Loop or Connection: If you’re creating a loop at the end of the leader for attaching terminal tackle, fold the fluorocarbon leader material back on itself to form a loop of the desired size. Insert both ends of the leader material through a leader sleeve or crimp, then use a crimping tool to secure the sleeve or crimp in place, ensuring a strong and reliable connection.
- Attach Terminal Tackle: Once the loop or connection is formed, attach your desired terminal tackle, such as hooks, swivels, or snaps, using appropriate knots like the improved clinch knot or palomar knot. Make sure to moisten the knot before tightening to prevent friction heat from weakening the fluorocarbon.
- Test and Inspect: Before fishing with your newly constructed fluorocarbon leader, carefully inspect all connections for strength and security. Test the knots and connections by applying gentle pressure to ensure they hold up under tension.
- Adjust as Needed: Depending on your fishing conditions and target species, you may need to adjust the length and configuration of your fluorocarbon leader. Be prepared to experiment with different leader lengths, hook sizes, and terminal tackle to find what works best for your fishing situation.
Building Braided Fishing Leaders
Braided leaders are gaining popularity among anglers for their exceptional strength-to-diameter ratio, low stretch, and increased sensitivity. Constructing your own braided leaders allows you to customize the length, strength, and configuration to suit your fishing preferences and target species. Here’s a straightforward guide to building braided leaders.
Materials Needed:
Before you start building your braided leader, gather the following materials:
Braided Fishing Line: Choose a high-quality braided fishing line in the appropriate pound test for your target fish species and fishing conditions.
Cutting Tool: Sharp scissors or line cutters are essential for cleanly cutting the braided fishing line to the desired length.
Leader Sleeves or Crimps: Select leader sleeves or crimps in the appropriate size for creating loops or connections in your braided leader.
Crimping Tool: A crimping tool is necessary for securely attaching terminal tackle and forming connections between leader segments.
Construction Steps:
- Cut Braided Line: Start by cutting the braided fishing line to the desired length for your braided leader. Consider factors such as water clarity, the size of the fish you’re targeting, and the type of bait or lure you’ll be using.
- Form Loop or Connection: If you’re creating a loop at the end of the leader for attaching terminal tackle, fold the braided line back on itself to form a loop of the desired size. Insert both ends of the braided line through a leader sleeve or crimp, then use a crimping tool to secure the sleeve or crimp in place, ensuring a strong and reliable connection.
- Attach Terminal Tackle: Once the loop or connection is formed, attach your desired terminal tackle, such as hooks, swivels, or snaps, using appropriate knots like the improved clinch knot or palomar knot. Ensure that the knots are snug and secure to prevent slippage.
- Test and Inspect: Before fishing with your braided leader, carefully inspect all connections for strength and security. Test the knots and connections by applying gentle pressure to ensure they hold up under tension.
- Adjust as Needed: Depending on your fishing conditions and target species, you may need to adjust the length and configuration of your braided leader. Experiment with different leader lengths and terminal tackle setups to find what works best for your fishing situation.
Creating Wire Fishing Leaders for Toothy Fish
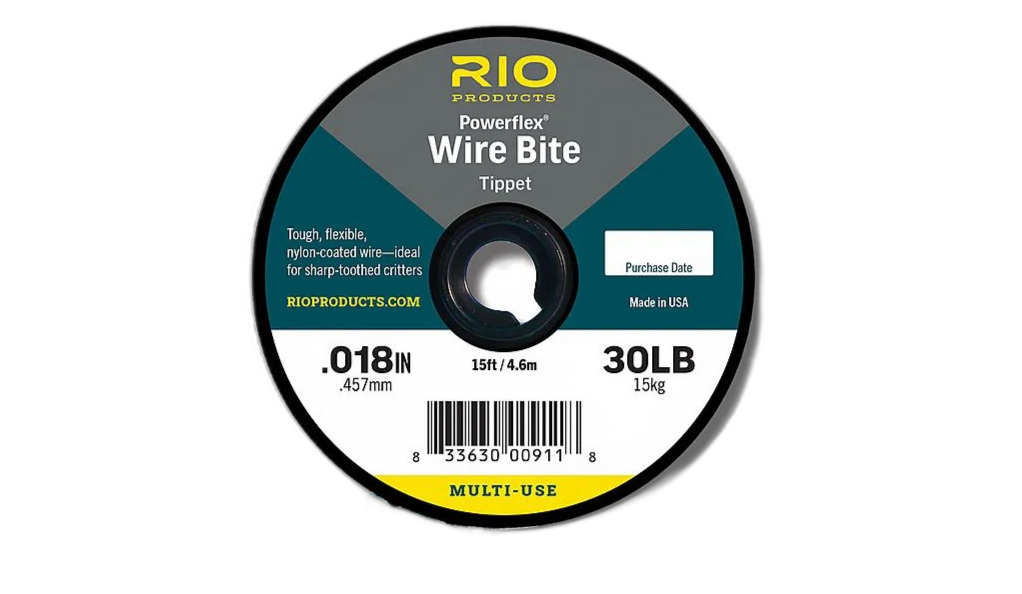
Wire leaders are essential when targeting toothy fish species like pike, muskie, and barracuda. These leaders provide the necessary protection against sharp teeth and abrasion, ensuring your line remains intact during intense battles. Here’s a guide to creating wire leaders for toothy fish.
Materials Needed:
Before you begin, gather the following materials:
1. Wire Leader Material: Choose a high-quality wire leader material specifically designed for toothy fish. Stainless steel or titanium wire leaders are popular choices due to their durability and resistance to corrosion.
2. Cutting Tool: Use wire cutters or heavy-duty scissors to cleanly cut the wire leader material to the desired length.
3. Crimping Tool: A crimping tool is necessary for securely attaching terminal tackle and forming connections between leader segments.
4. Leader Sleeves or Crimps: Select leader sleeves or crimps in the appropriate size for creating loops or connections in your wire leader.
Construction Steps:
1. Cut Wire Leader Material: Start by cutting the wire leader material to the desired length for your fishing rig. Consider factors such as the size of the fish you’re targeting and the strength of their teeth.
2. Form Loop or Connection: If you’re creating a loop at the end of the wire leader for attaching terminal tackle, use a leader sleeve or crimp to secure the loop. Insert both ends of the wire leader material through the sleeve or crimp, then use a crimping tool to secure it in place.
3. Attach Terminal Tackle: Once the loop or connection is formed, attach your desired terminal tackle, such as snaps, swivels, or hooks, using appropriate knots like the improved clinch knot or palomar knot. Ensure that the knots are snug and secure to prevent slippage.
4. Test and Inspect: Before fishing with your wire leader, carefully inspect all connections for strength and security. Test the knots and connections by applying gentle pressure to ensure they hold up under tension.
5. Adjust as Needed: Depending on your fishing conditions and target species, you may need to adjust the length and configuration of your wire leader. Be prepared to experiment with different leader lengths and terminal tackle setups to find what works best for your fishing situation.
Adding Fishing Leader Enhancements
Enhancing your fishing leaders can improve their performance and effectiveness in various fishing scenarios. Whether you’re looking to increase visibility, durability, or functionality, there are several enhancements you can incorporate into your leaders. Here’s a guide to adding leader enhancements to elevate your fishing game.
Fluorocarbon Coating:
Adding a fluorocarbon coating to your leaders can enhance their invisibility underwater, making them less visible to wary fish. Fluorocarbon coatings provide an extra layer of protection against abrasion and UV damage, increasing the lifespan of your leaders.
Color Markers:
Applying color markers to your leaders can help increase visibility and make it easier to track your line’s movement on the water surface. Use bright or contrasting colors to make your leaders stand out against different water backgrounds.
Wire Inserts:
For leaders targeting toothy fish species, incorporating wire inserts can provide additional protection against teeth and abrasion. Wire inserts are typically made of stainless steel or titanium and are inserted into the leader material to reinforce its strength and durability.
Reflective Tape:
Adding reflective tape to your leaders can enhance visibility in low light conditions or when fishing in murky waters. Reflective tape reflects light, making your leaders more visible to both fish and anglers, especially during dawn, dusk, or nighttime fishing trips.
UV Resistant Coating:
To increase the longevity of your leaders when exposed to sunlight, consider applying a UV-resistant coating. This coating helps protect the leader material from UV damage, preventing degradation and ensuring optimal performance over time.
Testing and Inspecting Your Fishing Leaders
Testing and inspecting your fishing leaders is crucial to ensure their reliability and performance on the water. Regular checks can help identify any weaknesses or issues before they compromise your fishing success. Here’s a comprehensive guide on testing and inspecting your leaders to maintain their integrity and functionality.
Visual Inspection:
Begin by visually inspecting your leaders for any signs of wear, damage, or abrasion. Look for frayed or kinked sections, discoloration, or irregularities along the length of the leader. Pay close attention to knots and connections, ensuring they are securely tied and show no signs of slippage or weakness.
Tension Test:
Perform a tension test by applying gentle pressure to different sections of the leader. Check for any weak spots or areas of stretching that could indicate potential failure under heavier loads. Pay particular attention to knots and connections, as they are common weak points in leader systems.
Knot Strength Test:
Test the strength of knots used in your leader system by gently pulling on each knot with increasing pressure. Monitor for any signs of slipping, unraveling, or breakage. Replace any compromised knots with fresh ones to ensure the integrity of your leader.
Flexibility Test:
Flexibility is essential for leaders to perform well in different fishing scenarios. Flex the leader material between your fingers to assess its suppleness and resilience. Stiff or brittle leaders may be prone to breakage and should be replaced to maintain optimal performance.
By incorporating these testing and inspection techniques into your fishing routine, you can ensure the reliability and performance of your leaders, giving you confidence during your fishing adventures.
Troubleshooting Common Fishing Leader Problems
Even the most carefully crafted fishing leaders can encounter issues that affect their performance on the water. Understanding and addressing common leader problems is essential for ensuring a successful fishing trip. Here are some troubleshooting tips for common leader issues:
Leader Knot Slippage:
Issue: One of the most frustrating problems anglers encounter is knot slippage, where knots fail to hold under tension, leading to lost fish and gear.
Solution: Ensure that you’re tying your knots correctly, with sufficient wraps and proper tightening. Consider using lubricants like saliva or water to reduce friction when tightening knots. Additionally, choose knots that are well-suited for the type of line and terminal tackle you’re using.
Leader Line Twist:
Issue: Leader line twist can occur during casting or retrieval, resulting in tangled lines and decreased casting distance.
Solution: To prevent leader line twist, avoid overloading your reel, which can cause excessive line twist during casting. Consider using a swivel between your mainline and leader to minimize twisting. When retrieving, maintain tension on the line to prevent loops from forming.
Leader Abrasion:
Issue: Abrasion occurs when the leader comes into contact with rough surfaces like rocks, shells, or teeth, weakening the line and increasing the risk of breakage.
Solution: Regularly inspect your leader for signs of abrasion, such as fraying or discoloration. Consider using leader sleeves or crimps to protect vulnerable sections of the leader, especially near knots and terminal tackle. Upgrading to a more abrasion-resistant leader material can also mitigate this issue.
Leader Tangle:
Issue: Tangles in the leader can occur during casting, retrieval, or storage, leading to frustration and wasted time on the water.
Solution: Properly organize and store your leaders to prevent tangling. When casting, avoid abrupt changes in direction or excessive slack in the line, which can contribute to tangles. If tangles occur frequently, consider adjusting your casting technique or using anti-tangle devices like line guides.
Leader Visibility:
Issue: In certain fishing conditions, leaders may become too visible to fish, leading to decreased strikes.
Solution: Choose leader materials and colors that match the water clarity and light conditions of your fishing environment. Consider using fluorocarbon leaders for their low visibility properties, especially in clear water. Adding leader enhancements like color markers or fluorocarbon coatings can also help reduce visibility.
By addressing these common leader problems with the suggested solutions, anglers can enjoy a smoother and more productive fishing experience.
Advanced Fishing Leader Techniques
Mastering advanced leader techniques can significantly improve your fishing success, allowing you to adapt to different conditions and target a wider range of fish species. Here are some advanced leader techniques to elevate your fishing game:
Double-Dropper Rigs:
Description: Double-dropper rigs consist of a mainline with two or more leader lines attached at different intervals. This setup allows you to present multiple baits or lures simultaneously, increasing your chances of enticing fish.
Technique: Tie a dropper loop or use specialized rigs to attach additional leaders to your mainline. Vary the lengths of the leader lines to cover different depths or present baits at staggered intervals. Experiment with different bait combinations to maximize your catch potential.
Wind-On Fishing Leaders:
Description: Wind-on leaders are long, seamless leaders that allow for smooth casting and minimize the risk of tangles. They are ideal for casting large baits or lures with heavy tackle.
Technique: Use specialized tools or knots to create seamless connections between the mainline and leader material. Opt for longer leader lengths to reduce the need for bulky connections and improve casting distance. Practice proper casting techniques to maintain control and accuracy when using wind-on leaders.
Shock Fishing Leaders:
Description: Shock leaders are heavy-duty leaders designed to absorb the shock of sudden strikes or aggressive fish, particularly when surf fishing or targeting large game fish.
Technique: Choose a shock leader material with a higher breaking strength than your mainline to absorb sudden impacts without breaking. Use a long, tapered leader to distribute stress evenly along the length of the leader. Secure the shock leader to the mainline using a strong knot, such as the Albright knot or FG knot.
Live Bait Fishing Leaders:
Description: Live bait leaders are specialized leaders designed for presenting live bait in a natural and enticing manner. They often feature adjustable rigs or sliding sinker setups to allow for natural movement of the bait.
Technique: Use circle hooks or bait-holder hooks to securely hold live bait without causing injury. Adjust the leader length and weight to match the depth and current of your fishing location. Experiment with different rigging techniques, such as Carolina rigs or drop-shot rigs, to find the most effective setup for presenting live bait.
By incorporating these advanced leader techniques into your fishing repertoire and understanding when and how to use them effectively, you can increase your chances of success and become a more versatile angler.
Conclusion: Mastering Your Fishing Leader Craft
In the world of fishing, leaders play a crucial role in connecting anglers to their target species. Whether you’re casting into freshwater streams, trolling in deep-sea waters, or fly fishing in tranquil lakes, the right leader can make all the difference between landing a trophy catch and going home empty-handed.
Throughout this guide, we’ve explored various aspects of fishing leaders, from understanding different types and materials to mastering advanced techniques. By learning how to choose, construct, and enhance your leaders, you can optimize your fishing setup to suit different conditions and target a wider range of fish species.
Remember, fishing leaders are not one-size-fits-all. Experimentation and adaptation are key to finding what works best for your unique fishing style and preferences. Whether you’re a seasoned angler or just starting out, continuous learning and refinement of your fishing leader skills will ultimately lead to greater success on the water.
So next time you’re gearing up for a fishing adventure, don’t overlook the importance of your fishing leaders. With the knowledge and techniques gained from this guide, you’ll be better equipped to tackle any fishing challenge that comes your way and reel in those prized catches with confidence!
